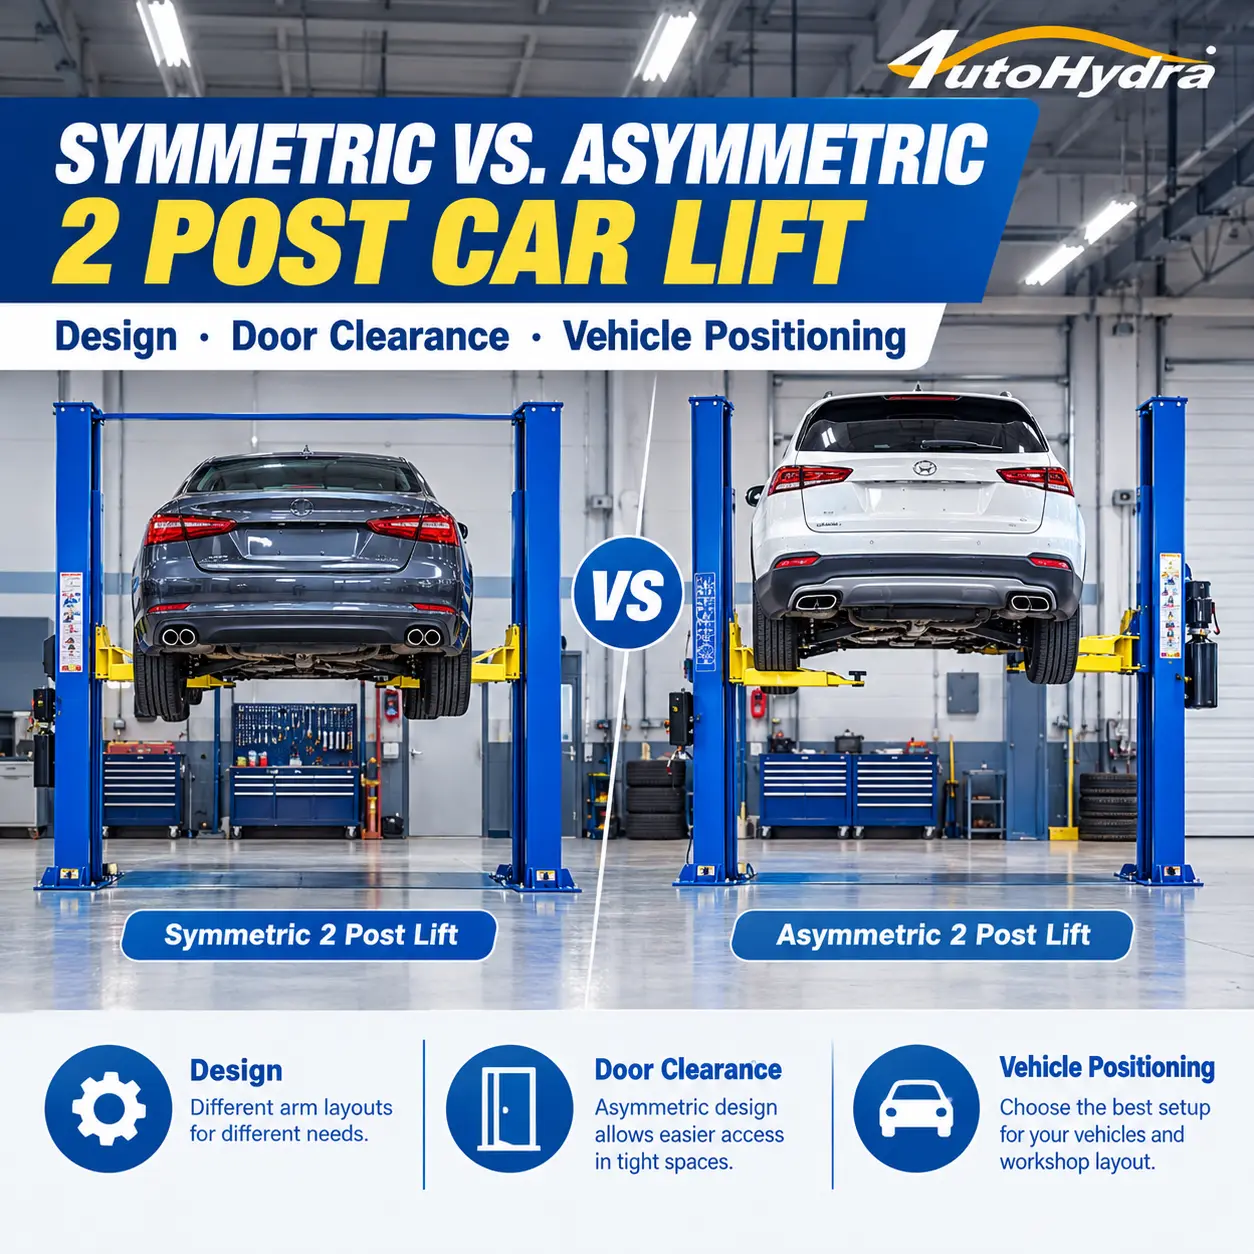
How to Lower a 2 Post Car Lift Safely: A Complete Guide
Lowering a vehicle on a 2 post car lift is just as important as raising it. After completing a repair, technicians must make sure the work area is clear, the vehicle is properly supported, and the lift's safety locks are released according to the equipment manufacturer's instructions.
A rushed lowering procedure can lead to vehicle damage, equipment interference, or serious injury. Tools left beneath the vehicle, incorrectly released safety locks, and people standing in the wrong area can all create unnecessary risks.
Whether you operate a two-post lift in a professional repair shop or a home garage, understanding the correct lowering procedure helps protect the vehicle, the equipment, and everyone nearby.
This guide explains the key checks and general steps involved in lowering a 2 post car lift safely.
⚠️ Important safety notice: This article provides general operating guidance only. Always follow the operating manual for your exact lift model, the manufacturer's safety-lock release procedure, and applicable workplace safety requirements. Never bypass, disable, or modify a lift safety device.
1. Understand the Safety System Before Lowering
A typical 2 post car lift uses hydraulic power to raise and lower vehicles. It also incorporates mechanical safety locks designed to help prevent unintended descent.
These systems perform different functions:
- Hydraulic system: Controls the movement of the lifting mechanism.
- Mechanical safety locks: Provide a mechanical safety position when properly engaged.
- Release mechanism: Allows the operator to release the safety locks using the method specified by the manufacturer.
- Control system: Operates the lift's raising and lowering functions.
💡 The exact arrangement varies by model. Some lifts use manual lock releases, while others use coordinated release mechanisms or different control arrangements.
Before operating the lift, identify:
- The location of the lowering control.
- The location and operation of the safety-lock release.
- The manufacturer's specified sequence for unloading and releasing the locks.
- The emergency-stop procedure.
- The safe operating area around the lift.
⛔ Never assume that two lifts with similar appearances have identical safety-lock systems.
2. Complete These Checks Before Lowering a Vehicle
Before operating the lowering control, inspect the vehicle and the surrounding area.
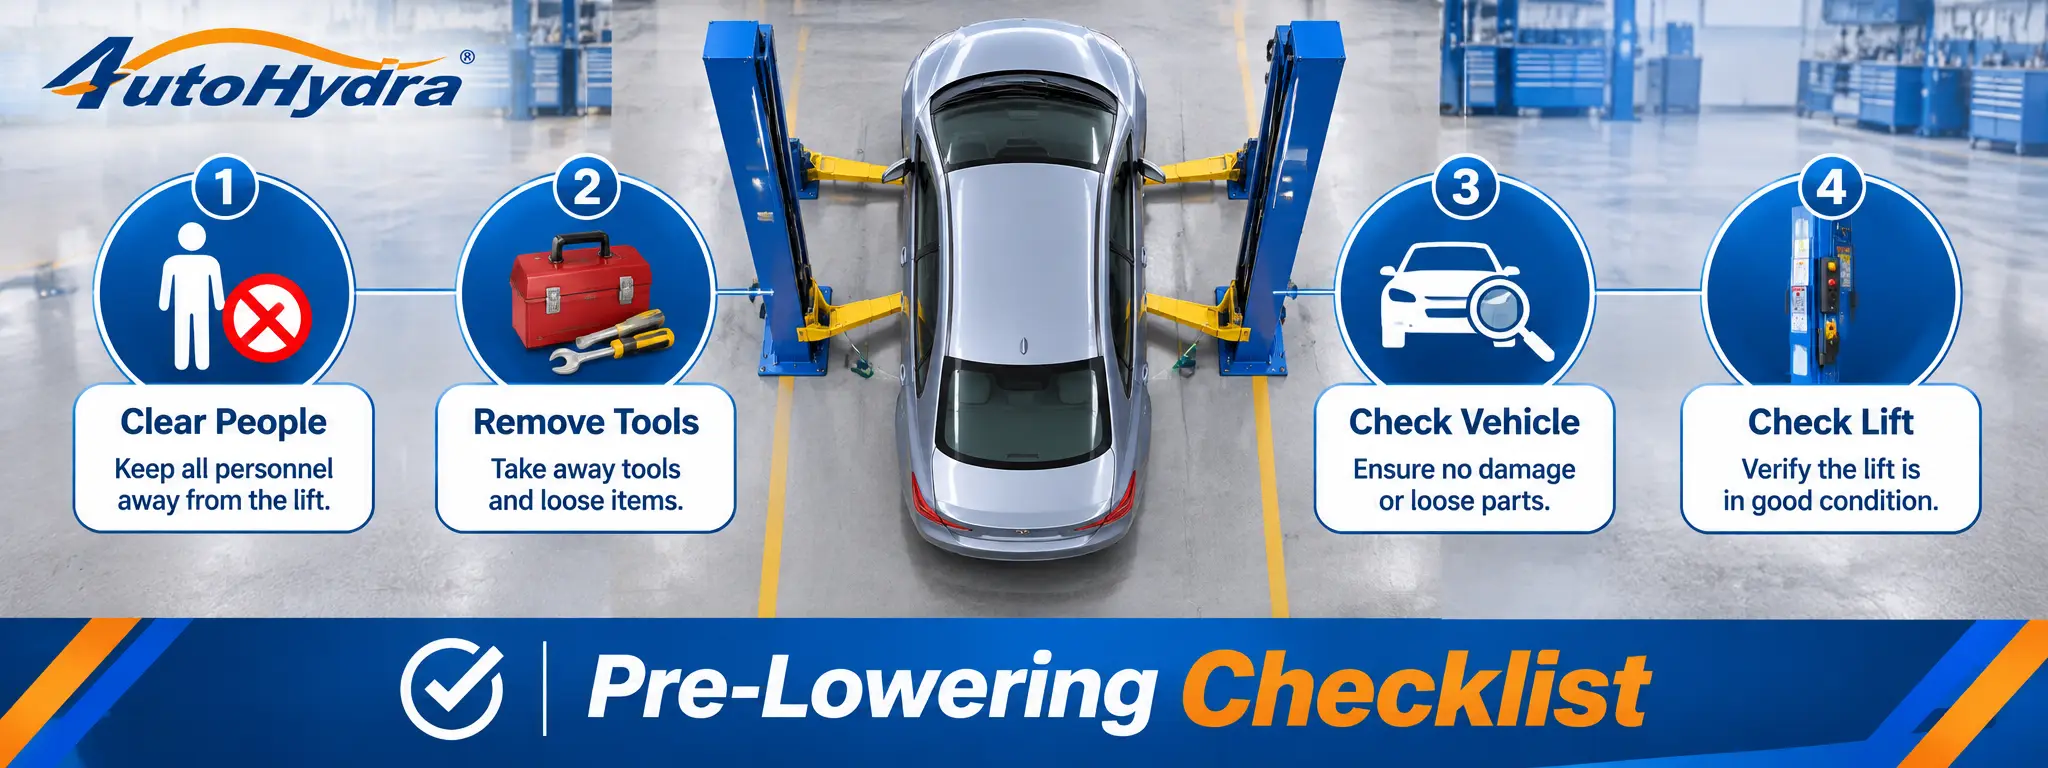
2.1 Make Sure Everyone Is Clear
Confirm that:
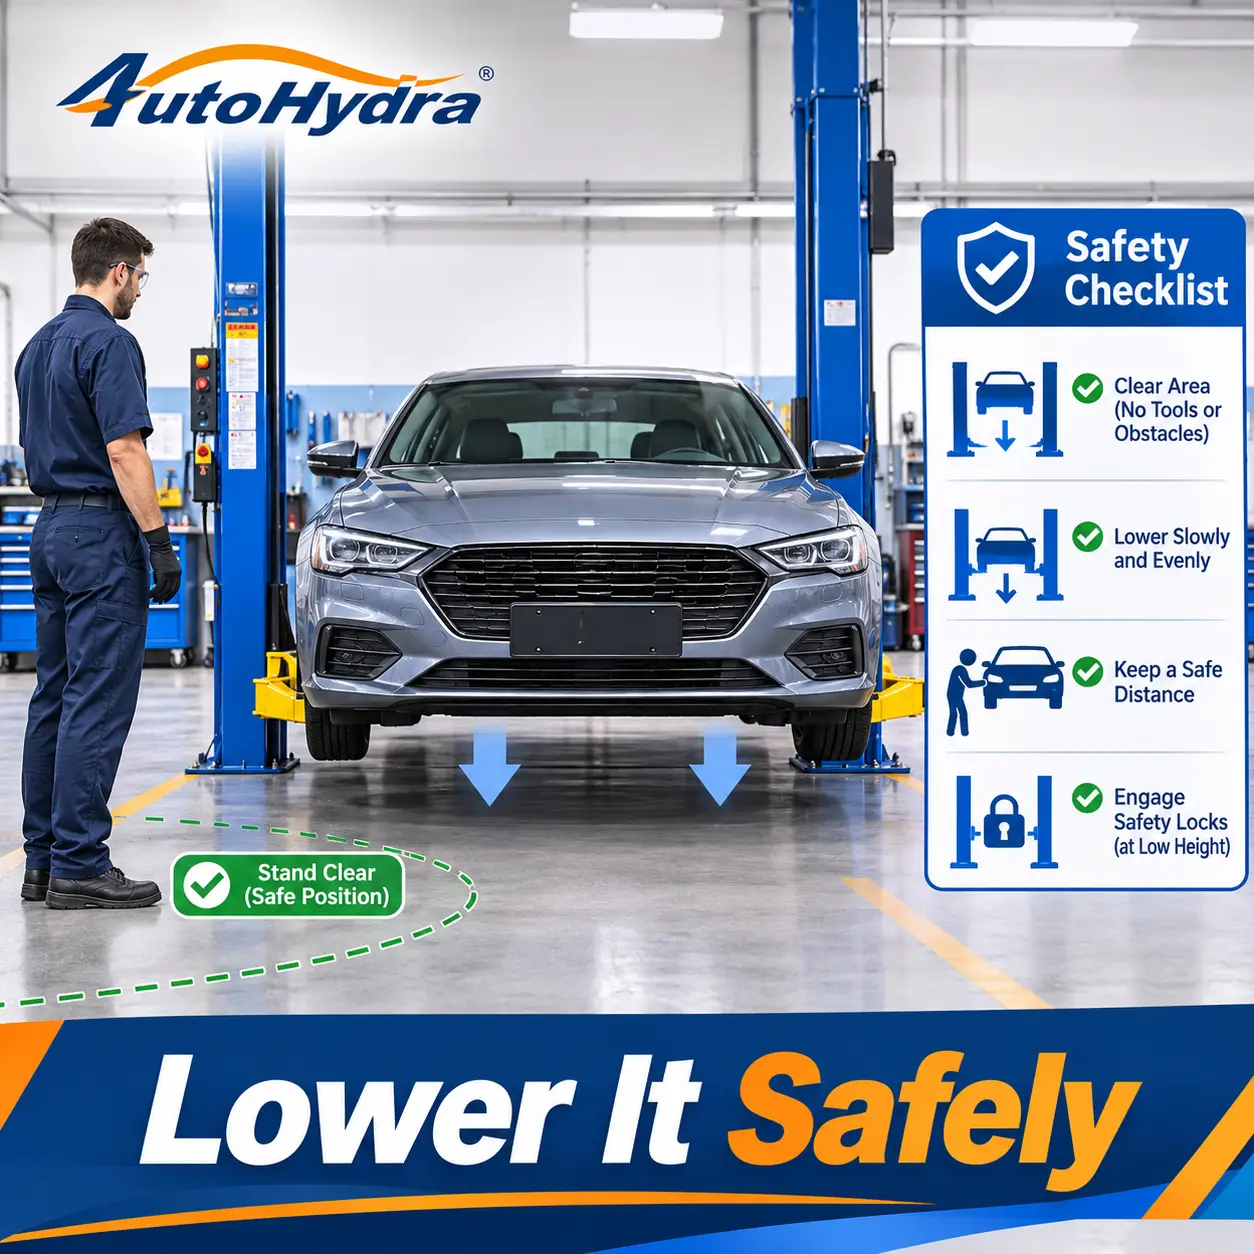
- ✅ No technician is working underneath the vehicle.
- ✅ No person is standing between the vehicle and the lift columns.
- ✅ No one is positioned near moving arms or other pinch points.
- ✅ Everyone nearby knows that the vehicle is about to be lowered.
⛔ Never allow anyone to remain beneath a vehicle while it is being lowered.
2.2 Remove Tools and Equipment
Check the floor and the area beneath the vehicle for:
- Toolboxes and tool carts.
- Floor jacks and jack stands.
- Drain pans and fluid containers.
- Parts, fasteners, and loose components.
- Electrical cables, air hoses, and extension cords.
- Equipment that could obstruct the lift arms or vehicle tires.
⚠️ Make sure nothing can become trapped as the vehicle approaches the floor.
2.3 Check the Vehicle
Before lowering, confirm that:
- The repair work is complete.
- No components or tools are hanging beneath the vehicle.
- Loose parts have been removed from the vehicle's interior and exterior.
- Doors, hoods, and other panels are secured as required.
- The vehicle is not connected to equipment that could restrict its movement.
- Any service equipment attached to the vehicle has been safely disconnected.
💡 Pay special attention to exhaust systems, suspension components, and other parts that may have been removed or repositioned during repair work.
2.4 Check the Lift and Surrounding Area
Inspect the visible lifting arms, pads, columns, and surrounding floor area.
⛔ Do not operate the lift if you notice damaged components, unusual hydraulic leakage, malfunctioning safety devices, or abnormal mechanical conditions.
If the lift appears unsafe, stop and follow the manufacturer's inspection and service procedures.
3. How to Lower a 2 Post Car Lift: Step-by-Step
The following sequence explains the general process. The actual safety-lock release and control sequence must come from the operating manual for your specific lift.
Step 1: Confirm the Vehicle Is Ready to Descend
Make one final check around the vehicle.
Ensure that all personnel have moved to a safe position, all tools have been removed, and the vehicle has sufficient clearance to descend.
Check that no overhead or nearby equipment can interfere with the vehicle.
⛔ Do not begin lowering if the vehicle is connected to a service device, exhaust extraction hose, or other equipment that could restrict movement.
Step 2: Identify the Lift's Safety-Lock Position
Check whether the lift is resting on its mechanical safety locks or is being supported hydraulically.
The correct procedure depends on the lift design.
⚠️ If the manufacturer requires the operator to unload the mechanical locks before releasing them, follow that exact procedure. Do not force a release handle or attempt to operate a control that is under load unless the manual specifically instructs you to do so.
Step 3: Release the Safety Locks as Instructed
Operate the safety-lock release using the manufacturer's specified method. Depending on the lift, this may involve a manual handle, release cable, lever, or another mechanism.
Important precautions:
- Use only the intended release control.
- Follow the specified sequence for both columns.
- Keep hands and clothing away from moving components.
- Do not reach into the lift mechanism to release a lock manually.
- Never bypass a safety device to make lowering easier.
⛔ If the locks do not release normally, stop. Do not force the mechanism or continue operating the lift. Refer to the manual or contact qualified service personnel.
Step 4: Lower the Vehicle Under Control
Once the safety locks have been released as specified, use the lowering control according to the manufacturer's instructions.
Keep the area clear and maintain a safe position where you can observe the vehicle and lift movement.
Lower the vehicle smoothly and remain alert for:
- Unexpected movement or tilting.
- Unusual noise.
- Interference between the vehicle and the columns.
- Lift arms or pads contacting nearby objects.
- Hoses, cables, or equipment becoming trapped.
⛔ Do not leave the operating area while the lift is moving.
Step 5: Stop if Anything Looks or Sounds Abnormal
If the vehicle moves unexpectedly, the lift descends unevenly, or an unusual sound occurs, stop operating the equipment and follow the manufacturer's emergency or fault-response procedure.
⛔ Do not attempt to correct arm position, pad placement, or mechanical problems while the vehicle is suspended.
If the vehicle cannot be lowered normally, keep people clear and contact qualified service personnel.
Step 6: Confirm the Vehicle Is Fully on the Floor
Continue the manufacturer's lowering procedure until the vehicle is fully supported by the floor.
Confirm that all tires are in stable contact with the floor and that the vehicle is no longer supported by the lift pads.
⚠️ Do not drive away until the lift arms and pads have been moved clear according to the operating instructions.
4. What to Do After the Vehicle Reaches the Floor
The lowering procedure is not complete until the vehicle can safely leave the lift bay.
4.1 Move the Lift Arms Away
Once the vehicle is fully supported on the floor, move the lifting arms and pads away from the vehicle according to the manufacturer's instructions.
Make sure the arms are positioned so they will not interfere with the vehicle's tires, doors, or bodywork.
⛔ Do not force an arm against a vehicle component.
4.2 Remove Wheel Chocks and Other Restraints
Remove wheel chocks or other temporary restraints only when the vehicle is fully supported on the floor and the applicable operating procedure permits it.
Check that the vehicle is in the correct transmission position and that the parking brake procedure is appropriate before moving it.
4.3 Drive the Vehicle Out Carefully
Before moving the vehicle:
- Confirm that the lift arms and pads are clear.
- Check that the path out of the bay is unobstructed.
- Make sure no cables, hoses, or tools remain connected.
- Move slowly and watch for clearance around the columns.
⛔ Never drive away while a lift arm or pad remains in contact with the vehicle.
4.4 Reset the Lift
When the vehicle has left the bay, return the arms and lift to the manufacturer's recommended parked position.
Make sure the operating controls are returned to their proper state and that the work area is ready for the next vehicle.
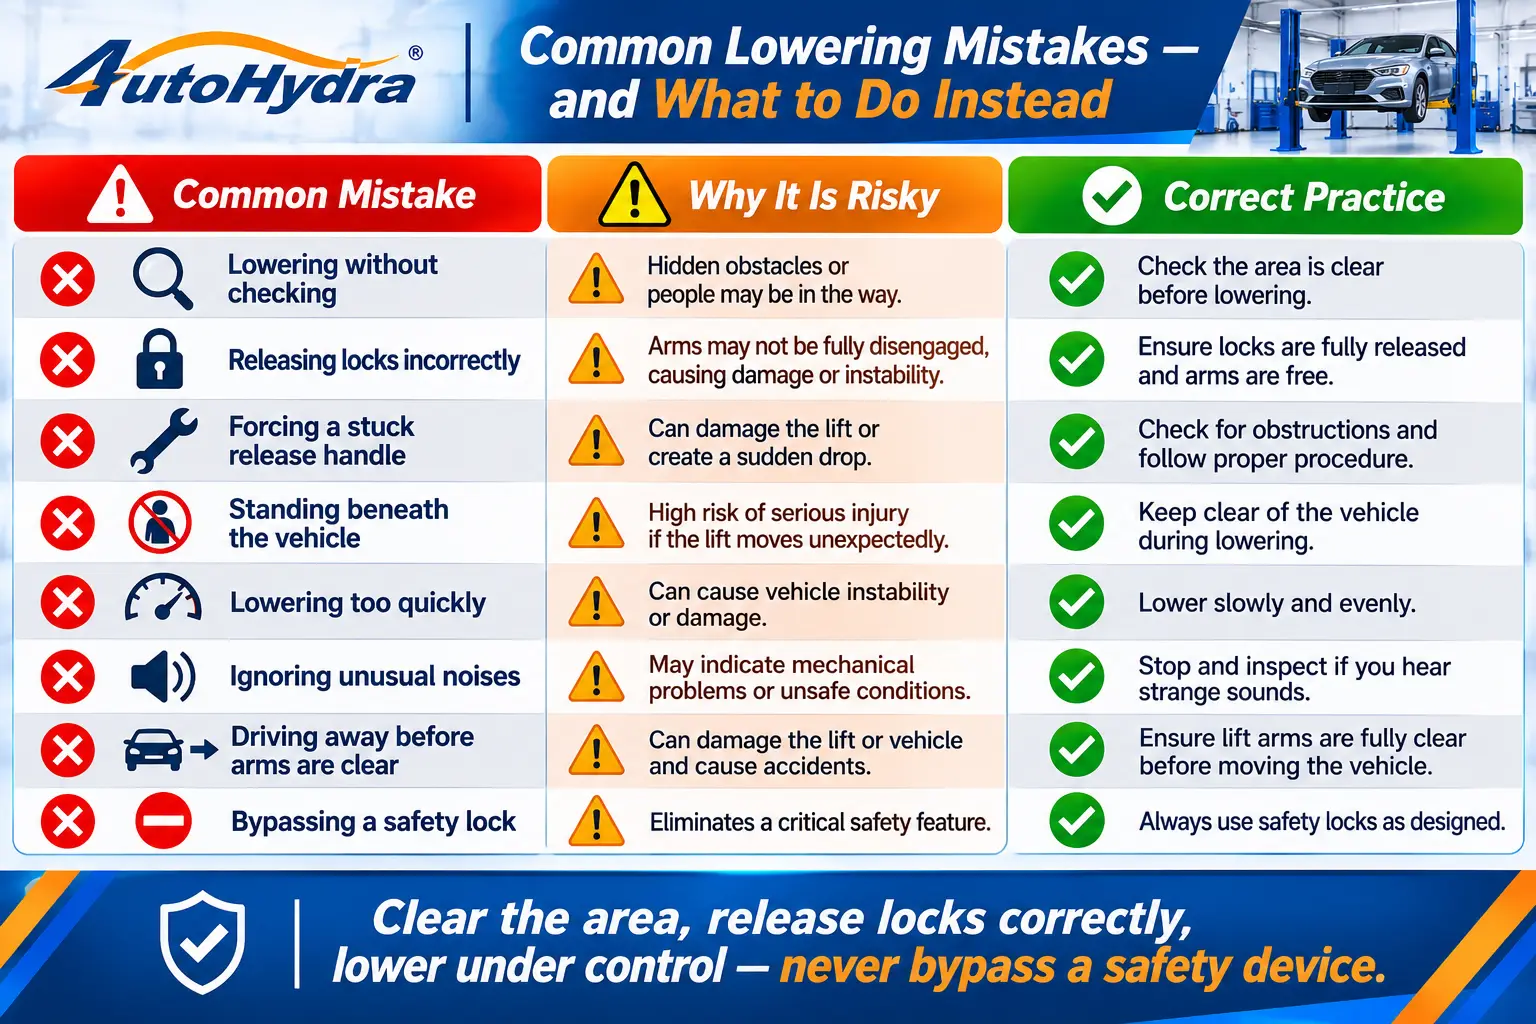
5. Common Mistakes When Lowering a 2 Post Car Lift
6. What If a 2 Post Car Lift Will Not Lower?
A lift that will not lower may have a safety-lock issue, hydraulic problem, electrical fault, control problem, or mechanical obstruction.
⛔ Do not repeatedly operate the controls or attempt an improvised release.
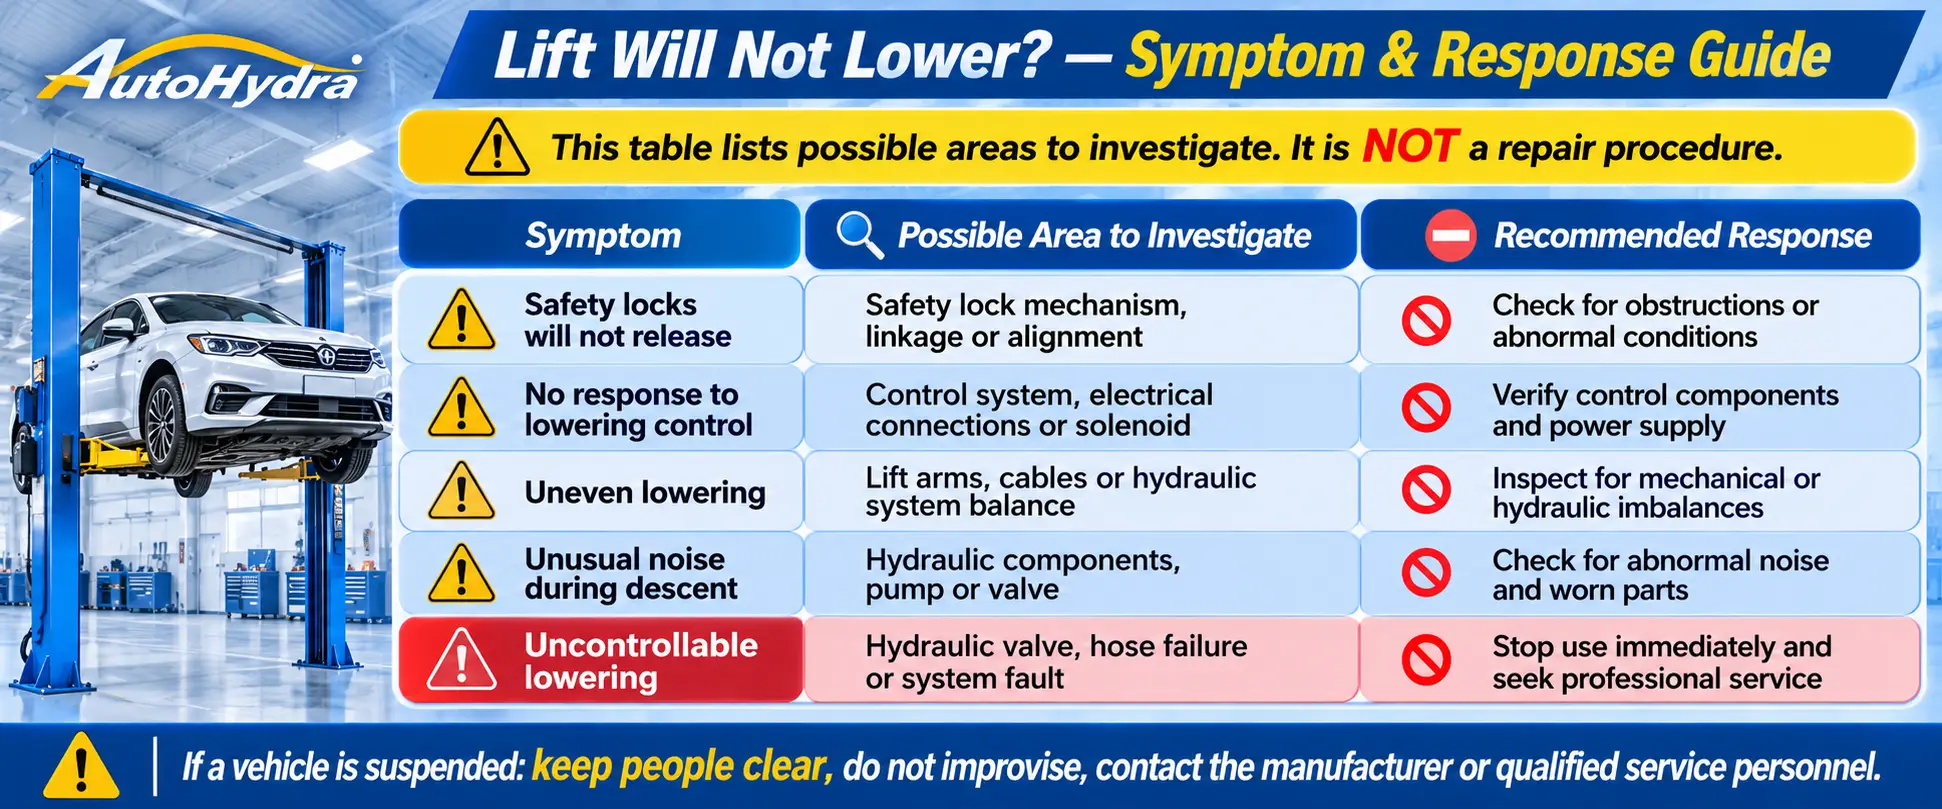
⚠️ If a vehicle is suspended and the lift cannot be lowered normally, do not attempt to improvise a rescue procedure. Keep people away from the hazard area and contact the lift manufacturer or qualified service personnel for model-specific instructions.
📖 For more information about common equipment problems, read AUTO HYDRA's Car Lift Troubleshooting Guide.
7. How to Keep a 2 Post Car Lift Safe for Daily Operation
Safe lowering depends on more than the operator's technique. The lift must also be maintained and inspected according to its manufacturer's requirements.
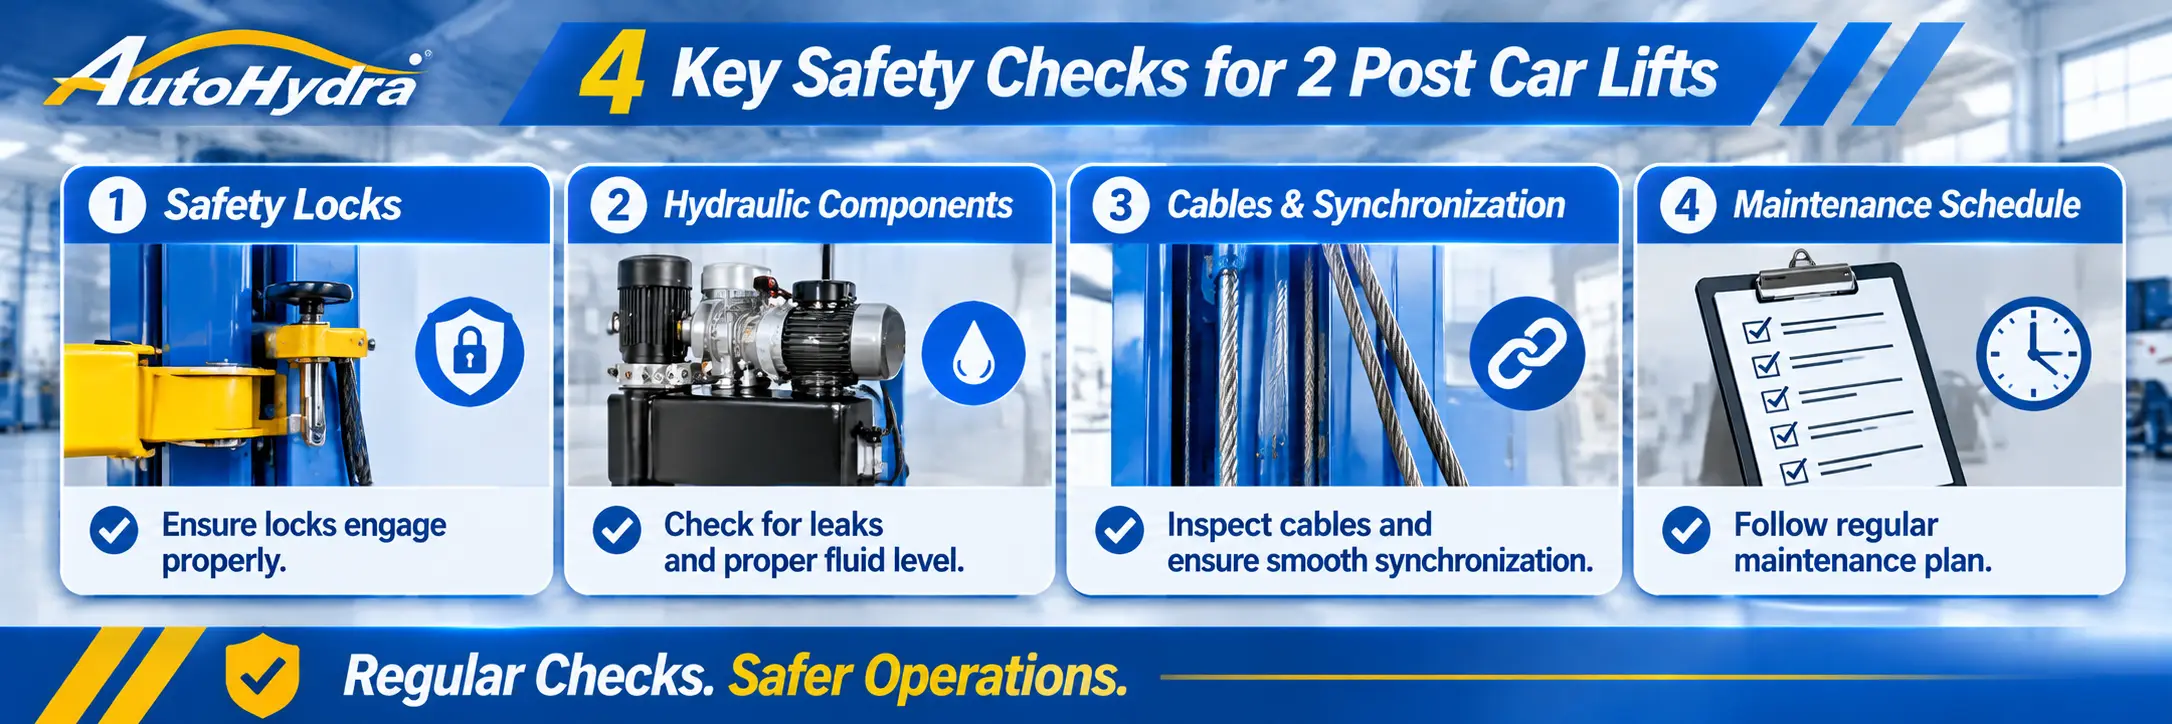
🔒 Check the Safety Locks
Inspect the safety-lock mechanisms and release components at the intervals specified by the manufacturer.
⛔ Do not operate the lift if a lock fails to engage or release as designed.
💧 Inspect Hydraulic Components
Look for visible leaks, damaged hoses, loose connections, or other abnormal conditions.
Hydraulic repairs should be handled by qualified personnel using the correct service procedure.
🔗 Check Cables and Synchronization Components
Where fitted, inspect equalizing cables and synchronization components according to the manufacturer's schedule.
Signs of wear, fraying, damage, or abnormal adjustment require attention before continued use.
📋 Follow the Maintenance Schedule
Keep records of inspections, maintenance, repairs, and any abnormal operating conditions.
📖 For a more detailed maintenance reference, see the Car Lift Maintenance Checklist and Safety Guide.
8. Choose a 2 Post Car Lift with Reliable Safety Features
A suitable two-post lift should match the vehicles you service, the available installation space, and the operating requirements of your shop.
When comparing models, look beyond rated lifting capacity.
Consider:
🔒 Mechanical safety locks: Understand how the locks engage and how they are released.
💧 Hydraulic system: Review the system design and the manufacturer's maintenance requirements.
🔧 Arm configuration: Confirm that the arms can reach the approved lifting points of your intended vehicles.
⚖️ Rated capacity and load distribution: Check the model's full operating specifications.
📖 Operating instructions: Make sure the manufacturer provides clear documentation for raising, lowering, inspection, and maintenance.
🛠️ Service support: Consider the availability of technical assistance and replacement parts.
AUTO HYDRA's related two-post lift guides can help you compare different capacity ranges:
⚠️ Always verify the specifications, safety documentation, and operating instructions for the exact model you are considering.
❓ Frequently Asked Questions
How do you lower a 2 post car lift?
First, clear the work area and make sure everyone is away from the vehicle. Then follow the lift manufacturer's procedure for unloading and releasing the mechanical safety locks. Use the lowering control as instructed, monitor the vehicle throughout the descent, and confirm that the vehicle is fully supported by the floor before moving the arms.
Do you need to release the safety locks before lowering a two-post lift?
Yes, the safety locks must be released according to the lift manufacturer's operating procedure before the lift can descend normally. The required sequence varies by model. Never force or bypass the release mechanism.
Why will my 2 post car lift not lower?
Possible causes include a safety-lock release issue, electrical or control fault, hydraulic problem, or mechanical obstruction. Stop operating the lift and consult the model-specific manual. If a vehicle is suspended, keep people clear and contact qualified service personnel.
Can you stand under a car while lowering a lift?
No. Keep everyone out from beneath the vehicle and away from moving components while the lift is operating. Never attempt to retrieve tools or reposition equipment underneath a suspended vehicle during lowering.
Should the vehicle be fully on the floor before moving the lift arms?
Yes. The vehicle must be fully supported by the floor before the arms and pads are moved clear, following the manufacturer's instructions. Do not pull or force arms away while they are still supporting the vehicle.
What should I do if the lift makes an unusual noise while lowering?
Stop operating the lift and follow the manufacturer's fault-response procedure. Keep people clear and arrange inspection by qualified service personnel before using the equipment again.
Are all two-post lift safety-lock systems operated in the same way?
No. Lock designs and release procedures vary among manufacturers and models. Always use the operating manual for the exact lift installed in your shop.
💡 Conclusion
Knowing how to lower a 2 post car lift safely is an essential part of responsible lift operation. Before lowering, clear the work area, check the vehicle, identify the safety-lock arrangement, and follow the manufacturer's release sequence. Lower the vehicle under control, remain alert to abnormal movement, and confirm that it is fully supported by the floor before moving the arms.
⛔ Never bypass safety locks or improvise a release procedure. A well-maintained lift, clear operating instructions, and consistent safety practices help protect technicians, vehicles, and workshop equipment.
Explore AUTO HYDRA's two-post lift guides to compare equipment specifications and choose a lift that fits your vehicles and service environment.
Need help selecting a two-post lift?
Explore AUTO HYDRA's two-post lift guides to compare equipment specifications and choose a lift that fits your vehicles and service environment.
Browse 2 Post Car LiftsRecommended News
View all