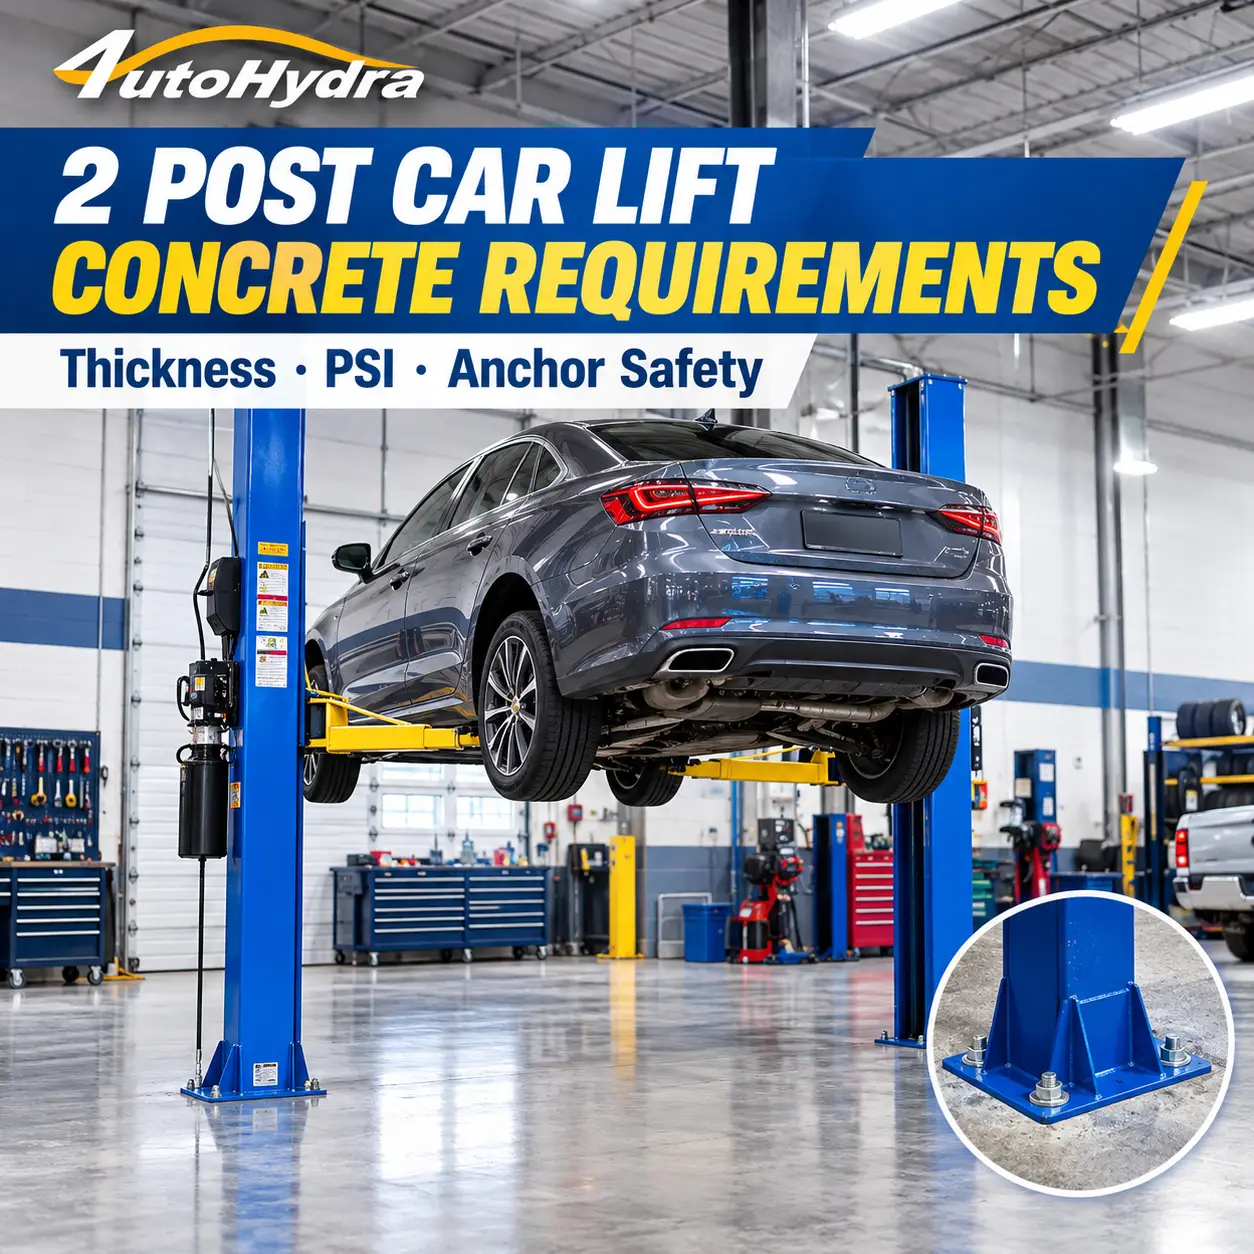
Installing a two-post car lift requires more than choosing the right lifting capacity and finding enough room in your garage. The concrete slab beneath the lift must also meet the equipment manufacturer's requirements.
A floor that looks solid may still be too thin, too weak, cracked, or unsuitable for the specified anchor bolts. If the foundation does not meet the lift's installation requirements, the anchors may not hold as intended, creating a serious safety risk.
So, what are the concrete requirements for a 2 post car lift? How thick should the slab be? What concrete PSI is needed? And how can you check an existing garage floor before purchasing a lift?
This guide explains the key factors to verify before installation, including concrete thickness, compressive strength, slab condition, anchor placement, and professional inspection.
📖 If you are still planning your installation, start with our related guide: How to Install a Car Lift: Step-by-Step Guide.
1. Why Concrete Requirements Matter for a 2 Post Car Lift
A two-post car lift supports a vehicle through lifting arms attached to two vertical columns. The columns transfer forces through their base plates and anchor bolts into the concrete foundation.
Unlike equipment that distributes weight across a broad platform, a two-post lift creates concentrated forces around its column bases. The slab must resist these forces under the conditions specified by the lift manufacturer.
Several factors influence whether a concrete floor is suitable:
🧱 Concrete thickness: The slab must provide the required depth for the specified anchors and installation design.
💪 Concrete compressive strength: The concrete must meet the minimum strength stated in the installation manual.
🔍 Slab condition: Cracks, deterioration, weak patches, and other defects may affect anchor performance.
📍 Anchor placement: Anchors must be installed at the specified locations and distances from slab edges, joints, and defects.
📏 Floor levelness: The installation surface must meet the manufacturer's requirements for levelness and allowable slope.
🔩 Subgrade and reinforcement: The underlying support and reinforcement may affect the suitability of the installation.
💡 These factors work together. A thick slab is not automatically suitable if the concrete is weak or damaged. Likewise, strong concrete does not compensate for insufficient thickness or incorrect anchor placement.
Before selecting a model, review the lift's installation requirements rather than relying on the appearance of the floor.
2. How Thick Does Concrete Need to Be for a 2 Post Lift?
There is no single concrete thickness that applies to every two-post car lift.
Some lift models specify a minimum slab thickness of approximately 4 inches, while others require a thicker slab. Requirements depend on the model, rated capacity, anchor design, installation configuration, and applicable site conditions.
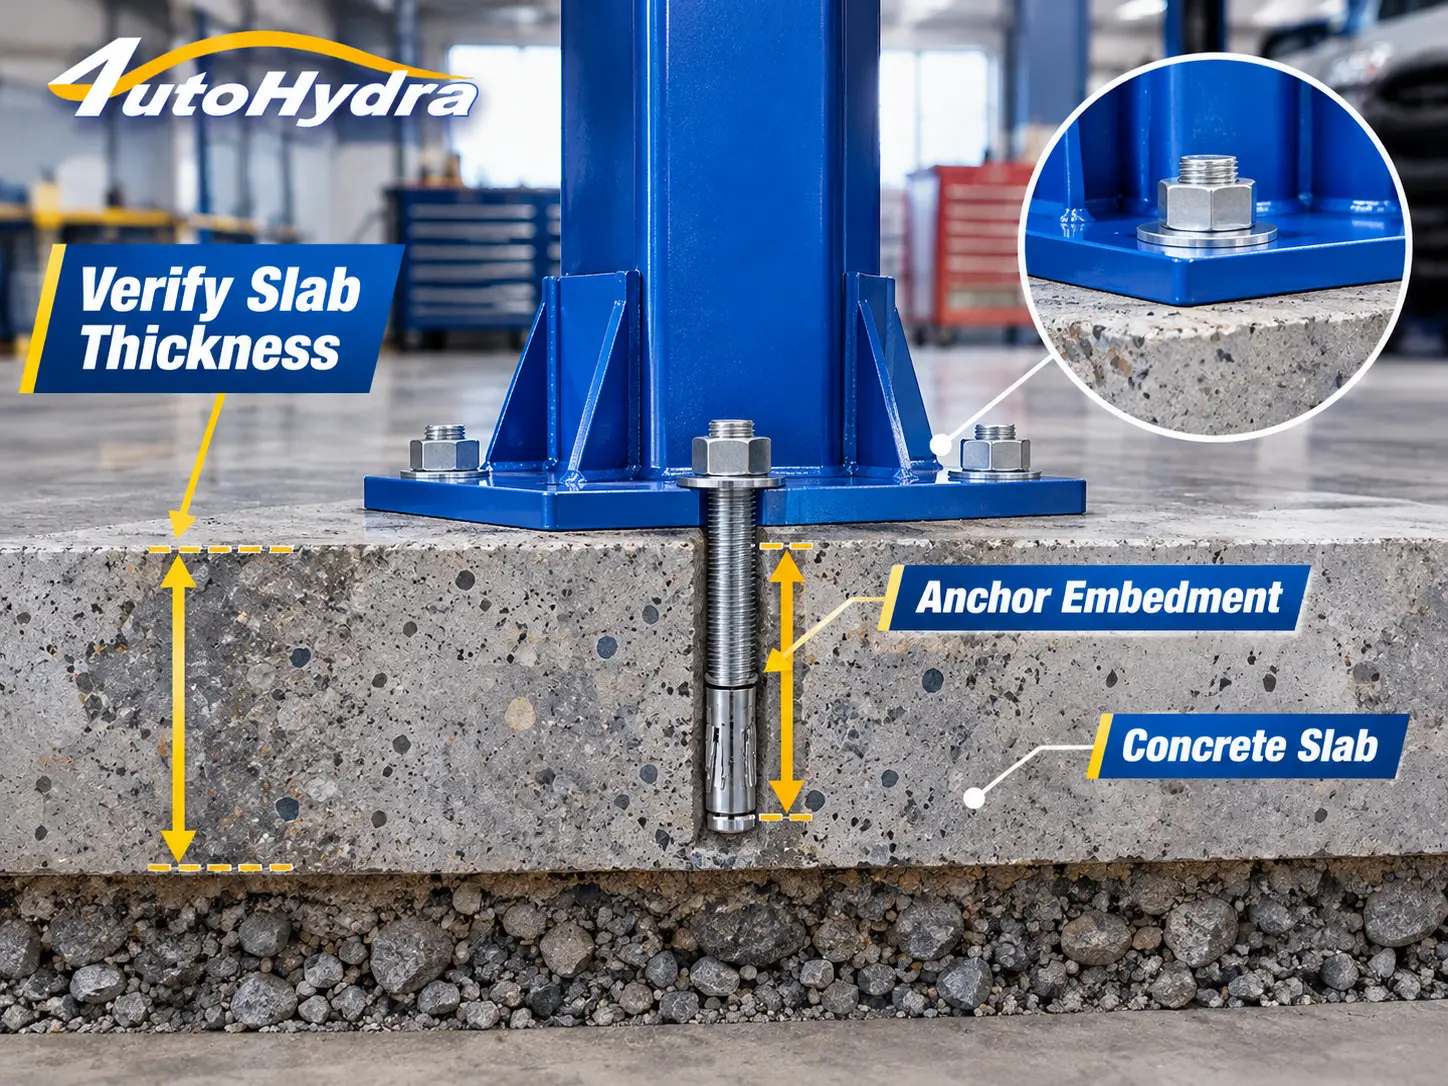
📌 Example: One manufacturer's two-post lift manual specifies a minimum 4.25-inch reinforced concrete slab with a minimum compressive strength of 3,000 PSI and at least 28 days of curing. Other lift models may specify different requirements.
⚠️ This example is a model-specific specification, not a universal standard for all two-post lifts.
What should you check?
● Before drilling any anchor holes, confirm the following:
● The minimum concrete thickness required by the exact lift model.
● Whether the requirement applies across the entire column footprint or at specified anchor locations.
● Whether steel reinforcement is required and what type is acceptable.
● Whether the slab must meet additional requirements for joints, edges, or nearby structural features.
● Whether the existing slab has enough verified depth and strength to meet the manufacturer's specifications.
⚠️ Do not count tile, leveling compound, floor coatings, or other surface layers as structural concrete thickness unless the manufacturer and a qualified professional explicitly confirm how the assembly should be evaluated.
If the slab thickness is unknown, do not assume that a typical residential garage floor is adequate.
Should you pour a thicker slab for extra safety?
A thicker slab may be appropriate for some installations, but simply adding concrete does not guarantee that a foundation is suitable.
The slab design, concrete strength, reinforcement, subgrade, anchor system, and load conditions must all be considered. If the existing floor does not meet the specified requirements, consult the lift manufacturer and a qualified concrete or structural professional about an acceptable solution.
3. What Concrete PSI Is Required for a 2 Post Lift?
Concrete PSI refers to its compressive strength, measured in pounds per square inch. It indicates how much compressive stress the concrete can withstand under the relevant test conditions.
Some two-post lift manuals specify concrete with a minimum compressive strength of 3,000 PSI. Other equipment or installation conditions may require a different value.
✅ Always use the minimum PSI specified in the installation manual for your exact model.
Do not select a PSI requirement based only on lifting capacity or another manufacturer's specifications.
How can you verify concrete strength?
Start by looking for available construction records, building plans, concrete specifications, or documentation from the original contractor.
These records may help establish the original concrete mix and slab design, but they do not necessarily confirm the current condition of an older floor.
If the strength cannot be verified, ask a qualified professional whether concrete testing is appropriate. Depending on the situation, a professional may recommend core sampling and laboratory testing or another suitable assessment method.
⚠️ A visual inspection alone cannot establish the actual compressive strength of concrete.
Does a 9,000 lb lift need the same concrete as a 12,000 lb lift?
Not necessarily.
Rated lifting capacity is an important consideration, but it does not independently determine the required slab thickness or PSI. Different lift designs and anchor systems can have different foundation requirements, even when their capacities are similar.
When comparing models, review each installation manual separately. Our guides to the 9,000 lb 2-post car lift, 11,000 lb 2-post lift, and 12,000 lb 2-post lift can help you explore different capacity options.
Use those articles to compare equipment needs, then confirm the concrete specifications for the model you intend to install.
4. How to Check an Existing Garage Floor Before Installation
An existing garage slab may be suitable for a two-post lift, but its condition and specifications need to be verified.
Use the following process as a planning checklist.
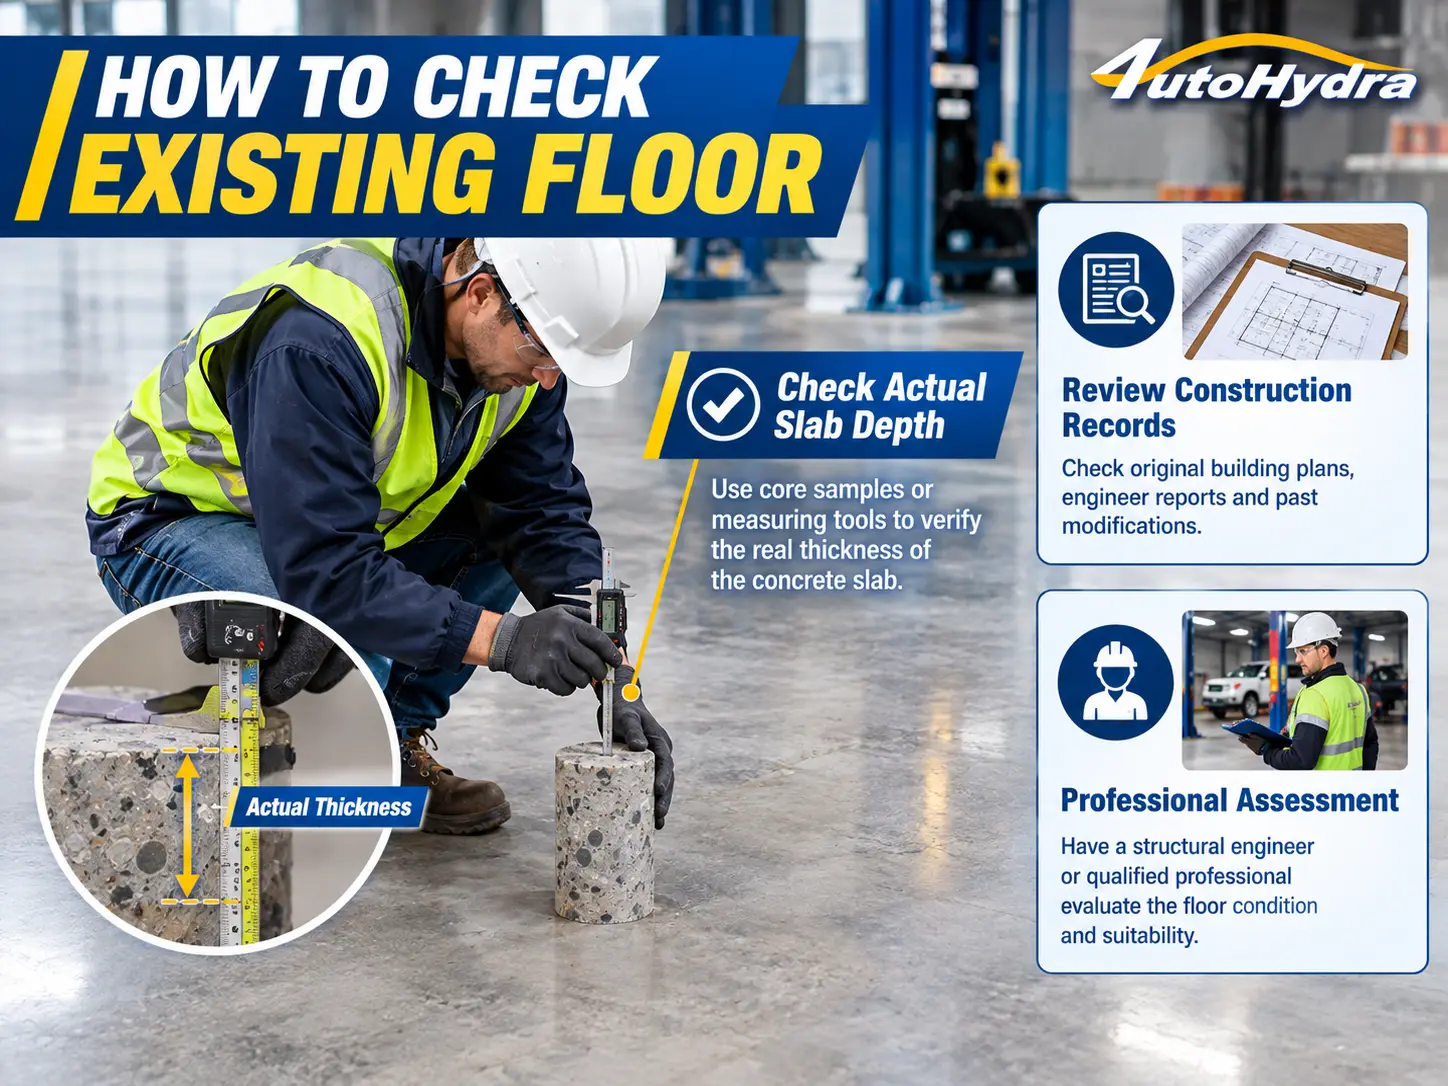
🔍 Step 1: Find the Original Concrete Specifications
Look for building plans, construction documents, contractor records, or previous inspection reports.
Try to establish:
● Original slab thickness.
● Specified concrete compressive strength.
● Reinforcement details, if documented.
● Any known repairs or structural modifications.
● Whether the slab is conventional concrete or a post-tensioned structure.
⚠️ Do not rely solely on the age of the house or the assumption that every residential garage was built to the same specification.
📍 Step 2: Identify the Exact Lift Location
Use the installation layout for the selected lift to identify the intended column positions and anchor locations.
The condition of the concrete matters specifically where the lift will be installed. A slab that appears sound in the middle of the garage may have different conditions near a wall, joint, drain, repair, or slab edge.
Confirm the layout before drilling.
👁️ Step 3: Inspect for Visible Damage
Examine the proposed installation area for:
● Cracks in or near the anchor footprint.
● Crumbling, flaking, or spalling concrete.
● Previous patches or repairs.
● Control joints and expansion joints.
● Areas that appear to have settled or separated.
● Moisture-related deterioration or exposed reinforcement.
⚠️ The presence of a crack does not by itself determine whether installation is possible, but it is a reason to stop and obtain a qualified assessment before proceeding.
Never assume that a surface patch restores the original structural capacity of the slab.
📏 Step 4: Verify Slab Thickness
If the available records do not establish the thickness, a qualified professional may recommend an appropriate measurement or testing method.
The assessment should verify the actual concrete depth at the relevant locations, not merely the thickness at a convenient edge elsewhere in the garage.
Before using a core drill or other invasive testing method, confirm the location of embedded utilities, reinforcement, and any post-tensioning cables.
👷 Step 5: Obtain a Professional Assessment When Needed
If the slab's strength, thickness, reinforcement, or condition remains uncertain, consult the lift manufacturer and a qualified concrete or structural professional.
This is especially important for older garages, heavily repaired floors, commercial workshops, and installations where the concrete specifications are unavailable.
⛔ Do not drill anchor holes or load the lift until the installation requirements have been confirmed.
5. Concrete Cracks, Joints, and Slab Edges: What to Watch For
Concrete defects and layout features can affect where a lift may be safely anchored.
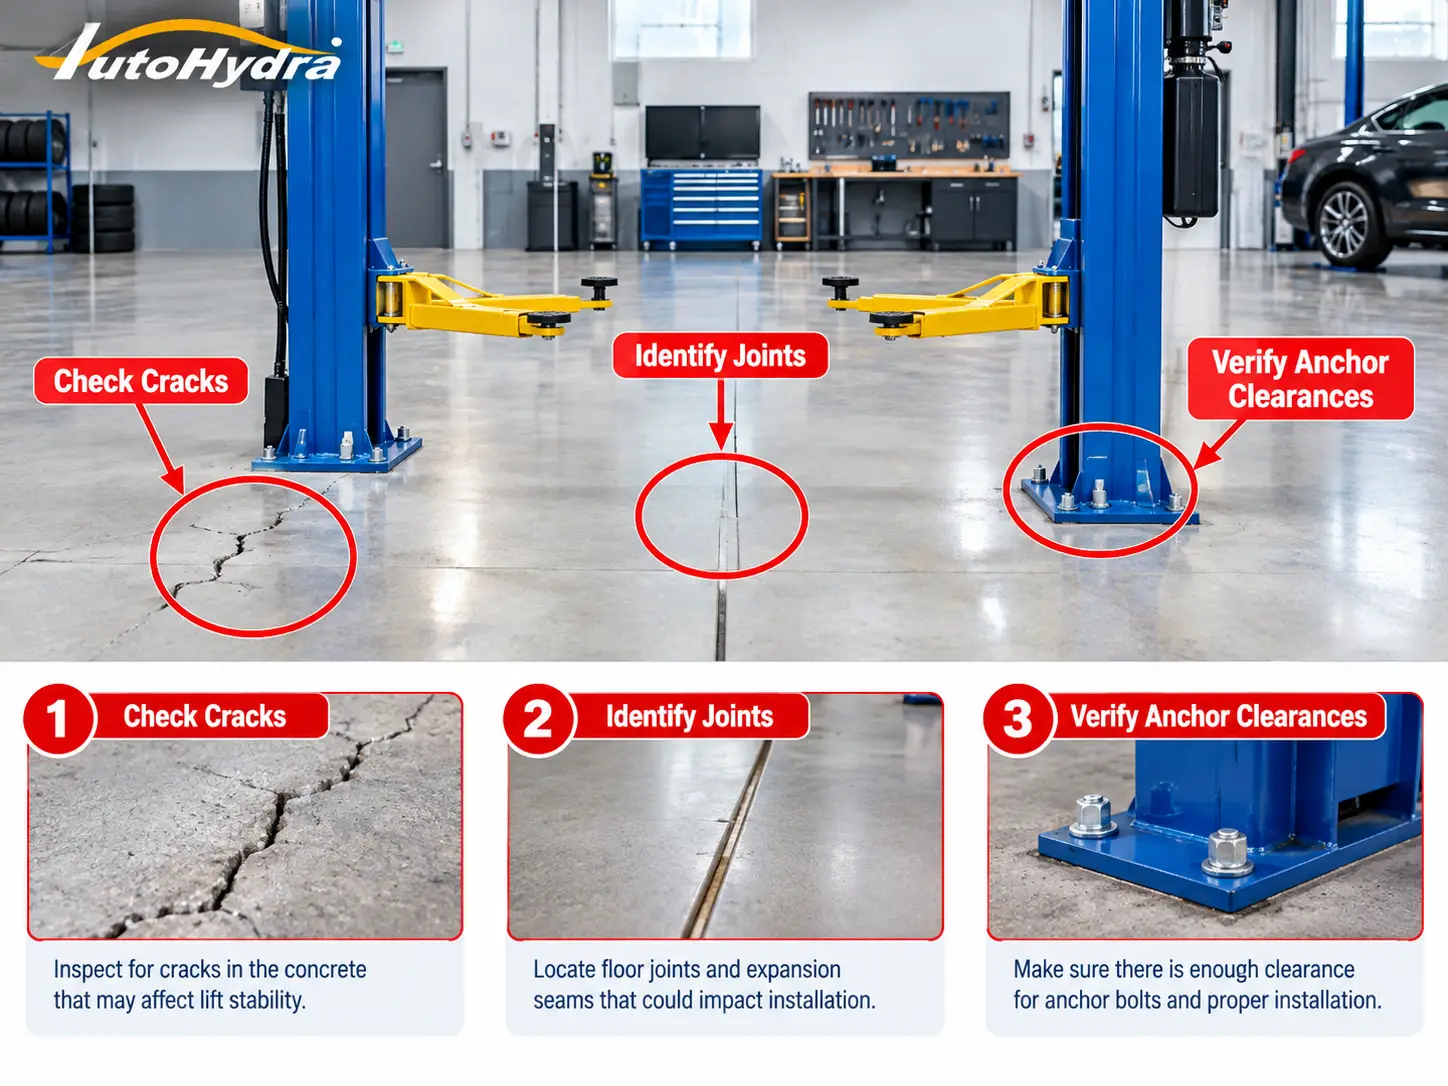
🔴 Cracks near the column base
Cracks can indicate movement, shrinkage, settlement, or other conditions. Their significance depends on the crack pattern, width, location, cause, and the lift manufacturer's requirements.
Do not install a lift over or near a crack simply because the crack appears small. Have the proposed location assessed against the equipment requirements.
📐 Expansion and control joints
Joints are intentional features in many concrete slabs, but anchor placement near them may be restricted.
The installation manual should specify any required separation from joints. Do not assume that a column can be moved a few inches without affecting the lift layout or anchor requirements.
🧱 Slab edges
Anchors placed too close to a free edge may not have the concrete surrounding them that the installation design requires.
Check the minimum edge distance specified by the manufacturer. If the planned layout cannot satisfy that distance, consult a qualified professional before changing the column positions.
🩹 Patched or deteriorated concrete
A repaired area is not automatically suitable for anchoring. The repair material and underlying slab may not provide the same performance as the original concrete.
Do not place anchors into a patched or deteriorated area unless the suitability has been verified.
6. What About Reinforcement and Post-Tensioned Concrete?
Reinforcement and post-tensioning are particularly important to understand before drilling.
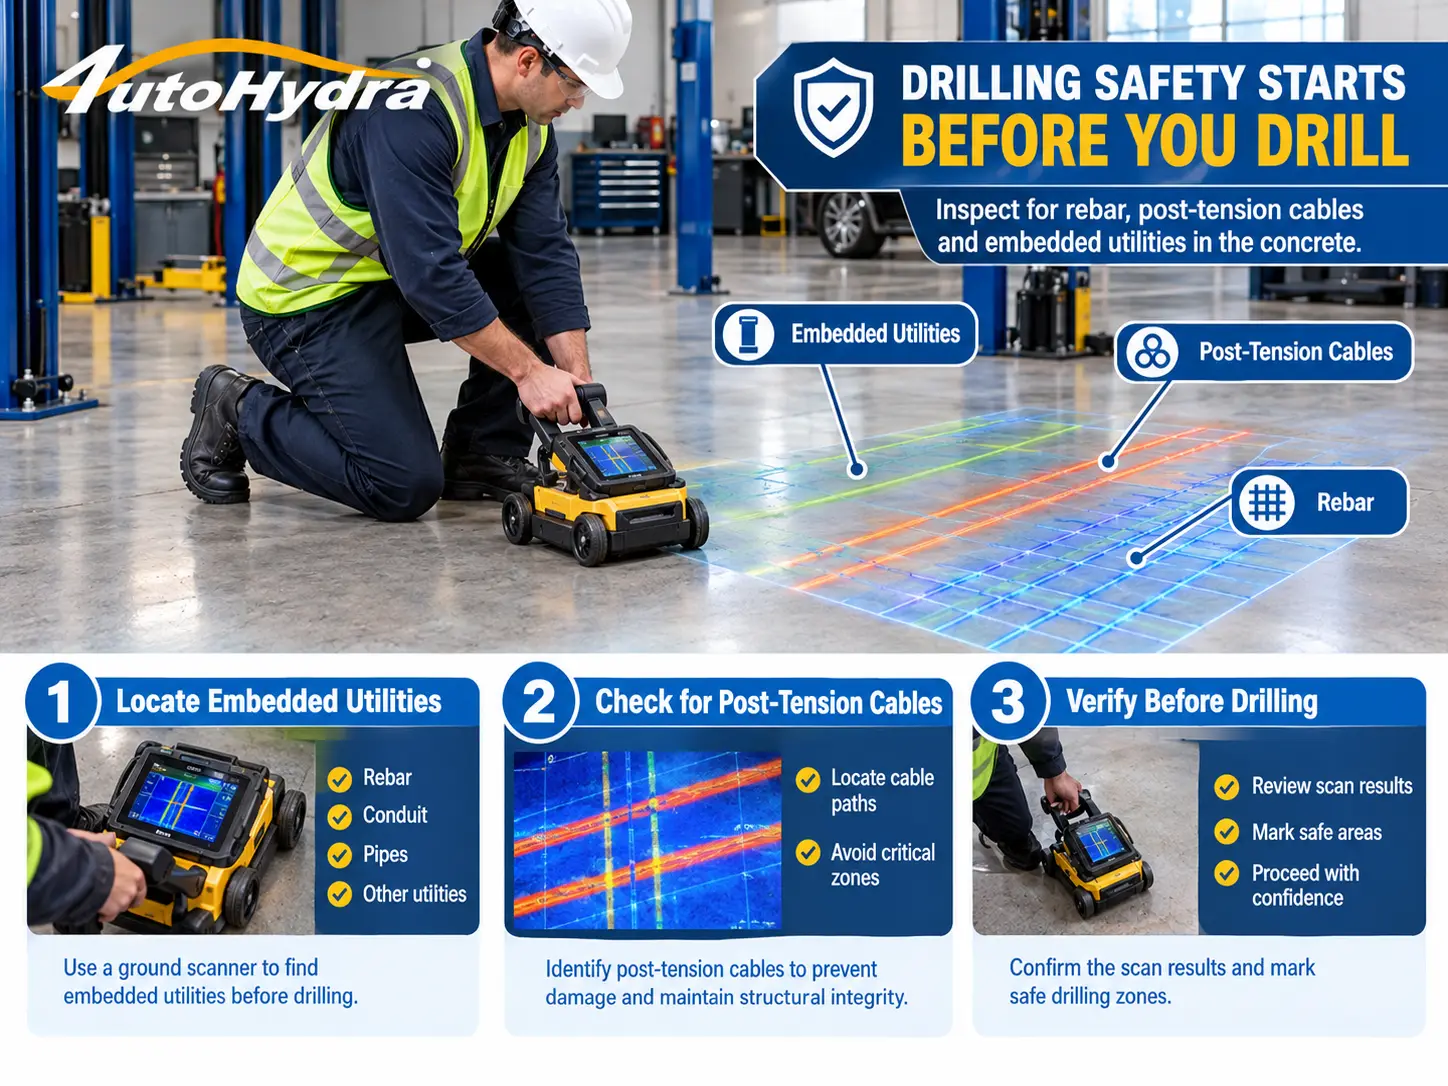
🔩 Reinforced concrete
Steel reinforcement may be required by the lift's installation specifications or the structural design. The type, location, and condition of the reinforcement matter.
⛔ Do not cut or relocate reinforcement simply to make room for an anchor without approval from a qualified professional.
⚡ Post-tensioned slabs
Some buildings use post-tensioned concrete slabs containing tensioned cables embedded within the concrete. Drilling into a tensioned cable can cause severe injury, structural damage, or worse.
If you suspect that the garage floor is post-tensioned, stop before drilling. Consult the building plans and a qualified professional who can determine how embedded cables and other services should be located.
⚠️ Never assume that a floor is safe to drill simply because no cables are visible at the surface.
🚰 Underground utilities
Water lines, electrical conduits, radiant heating systems, and other embedded services may also be present.
Confirm the location of these services before drilling or coring. Use appropriate locating procedures and qualified personnel.
7. Concrete Curing Time: When Can You Install a Car Lift?
Freshly poured concrete needs time to develop strength.
Some lift installation manuals specify a minimum curing period, such as 28 days, before anchor installation. However, the required time depends on the concrete specification, environmental conditions, testing results, and the requirements of the lift manufacturer and project engineer.
⚠️ Do not treat a generic curing period as proof that the slab has achieved the required strength.
Before drilling anchors into new concrete, confirm that:
✅ The specified curing period has been satisfied.
✅ The concrete has achieved the required strength.
✅ The slab thickness and reinforcement meet the installation design.
✅ The proposed anchor layout complies with the lift manual.
✅ Any applicable building or structural requirements have been addressed.
If the slab was poured recently or experienced unusual temperature or moisture conditions during curing, ask the concrete professional whether additional verification is needed.
8. What If Your Garage Floor Does Not Meet the Requirements?
If the existing floor fails to meet the lift manufacturer's specifications, do not proceed with installation as planned.
Possible next steps include:
🛠️ Option 1: Have the slab evaluated
A qualified professional can determine whether additional testing is needed and whether an acceptable installation location exists.
🏗️ Option 2: Develop an engineered foundation solution
Depending on the site and equipment, a professional may determine that a new or modified foundation is required. Any such work must be designed for the actual lift, slab, and site conditions.
🔄 Option 3: Reconsider the lift model or installation location
Another lift configuration may be more suitable, but switching models does not automatically eliminate foundation requirements. Check the new model's manual before making a decision.
⏸️ Option 4: Delay the purchase or installation
It is better to verify the floor before ordering equipment than to discover that the installation site is unsuitable after delivery.
⛔ Avoid improvised fixes, such as placing loose steel plates beneath the columns or using unapproved anchors. These changes can compromise the installation if they are not part of an approved design.
9. Concrete Requirements Checklist Before Buying a 2 Post Car Lift
Use this checklist before placing an order or scheduling installation.
□ Confirm the exact lift model and its installation manual.
□ Verify the minimum concrete thickness required.
□ Verify the required concrete PSI.
□ Confirm any reinforcement requirements.
□ Establish the condition and thickness of the existing slab.
□ Inspect the intended column locations for cracks, joints, patches, and deterioration.
□ Confirm anchor spacing and minimum edge distances.
□ Check for post-tensioning cables and embedded utilities before drilling.
□ Confirm that the floor meets the specified levelness requirements.
□ Verify curing and strength requirements for any new concrete.
□ Consult qualified professionals if any specification remains uncertain.
Once these requirements are confirmed, you can evaluate other installation factors such as ceiling clearance, vehicle dimensions, electrical supply, and working space.
📖 For more planning help, read our guide to car lift capacity and garage space requirements for a car lift.
❓ Frequently Asked Questions
Is 4 inches of concrete enough for a 2 post car lift?
Not necessarily. Some models specify a minimum around 4 inches, while others require a thicker slab or additional conditions. Check the installation manual for the exact model and verify the actual slab thickness at the required locations.
Is 3,000 PSI concrete enough for a two-post lift?
It may meet the requirement for some models, but it is not a universal specification. Confirm the required compressive strength in the manufacturer's installation manual.
Can I install a two-post lift on a cracked garage floor?
Do not proceed without assessing the crack and its location. Cracks near anchor locations may affect the installation's suitability. Have the proposed installation area evaluated by the lift manufacturer or a qualified professional.
Can I install a car lift on asphalt?
Do not assume asphalt is an acceptable foundation. Two-post lifts generally require a suitable concrete foundation that meets the manufacturer's specifications. Follow the installation manual and obtain professional guidance for the specific site.
How do I know whether my garage floor is thick enough?
Check construction records first. If the slab depth cannot be verified, ask a qualified professional to determine the appropriate measurement or testing method. Do not rely on the appearance of the floor or the thickness of an exposed edge in a different location.
How long should new concrete cure before installing a car lift?
Follow the requirements in the lift's installation manual and the concrete design. Some manuals specify at least 28 days, but the actual installation decision should also account for whether the concrete has reached the required strength and whether site conditions require additional verification.
Should I buy the lift before checking the concrete?
It is better to verify the installation site first. Confirm the slab requirements, available space, ceiling height, electrical supply, and anchor layout before committing to a model.
Need Help Verifying Your Garage Floor?
Get a free installation assessment from Auto-Hydra's lift experts — we'll help you review concrete requirements, anchor placement, and lift selection for your specific garage.
✔️ Free consultation · ✔️ Expert installation advice · ✔️ Fast shipping from US warehouses
Recommended News
View all